
Surface Mount Technology (SMT) has become the leading method in the electronics assembly industry. SMT, short for Surface Mounted Technology, is a process used to mount electronic components directly onto the surface of a printed circuit board (PCB). Due to its efficiency and precision, SMT has transformed the electronics manufacturing landscape, making it the go-to technique for high-volume production.
While the SMT assembly process can vary depending on the product, it generally follows this basic sequence: Incoming Material Inspection → Programming → Solder Paste Printing → Inspection → Component Placement → Pre-Reflow Inspection → Reflow Soldering → Automated Optical Inspection (AOI) → Repair → Testing → Final Assembly.
At the heart of the SMT process are three core stages: Solder Paste Printing, Component Placement, and Reflow Soldering. These stages have remained fundamental despite the advancements in technology. Today, these steps are fully automated, ensuring consistency and high quality in modern manufacturing.
1. Solder Paste Printing
Solder paste printing is the first crucial step in SMT assembly. The process resembles traditional ink printing, except that instead of ink, solder paste is applied to the PCB. The solder paste contains tiny solder particles mixed with flux, which helps the solder paste adhere to the PCB’s pads and eventually melt during reflow.
Key Equipment & Tools Used:
- Printing Machine: SMT factories use either fully automated or semi-automated machines to apply the solder paste. Automated machines are preferred for precision.
- Solder Paste: This special paste holds the components in place during the soldering process and ensures a solid electrical connection.
- Stencil: A thin metal sheet with cutouts matching the PCB’s solder pads, allowing the solder paste to be accurately applied. The stencil’s thickness and quality are crucial, especially when dealing with high-precision components like BGAs (Ball Grid Arrays).
Process Overview: The stencil is secured in the printing machine, and the PCB is placed underneath. Solder paste is added to the stencil and spread using a squeegee at a 45° angle. The machine aligns the PCB and stencil using fiducial marks (reference points). The solder paste is pressed through the stencil openings, depositing it precisely onto the PCB pads.
It’s important to note that up to 70% of SMT defects are related to the solder paste printing process, making it the most critical stage. Proper stencil design and printing adjustments are vital to ensuring high-quality assembly.

2. Component Placement (SMT)
After solder paste is applied, the next step is placing electronic components onto the PCB. The term “SMT” refers to the process of attaching surface-mount components to the PCB’s surface. The sticky nature of the solder paste allows the components to stay in place before being soldered.
How the Placement Works: Originally, components were placed manually using tweezers. Now, this process is automated using pick-and-place machines that can position thousands of components per hour with incredible precision.
Key Elements in the Placement Process:
- Nozzles (Suction Heads): These use vacuum suction to pick up components and accurately place them onto the solder paste.
- Feeders: Feeders hold and supply components to the machine. Different feeders are used for different component sizes and types.
- Placement Program: Each pick-and-place machine uses a pre-programmed sequence based on files such as the Gerber file, BOM (Bill of Materials), and Pick-and-Place file. This ensures components are placed accurately on the PCB.
Attention to Detail:
- Different component sizes require different nozzles and feeders.
- Special handling might be needed for complex components, such as antennas or hollow components, to prevent damage during placement.

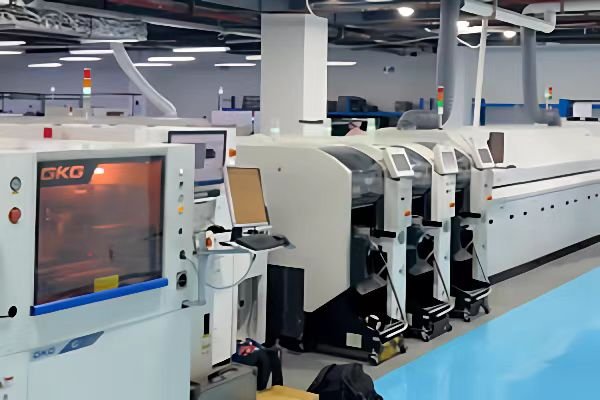
3. Reflow Soldering
Once the components are placed, the board goes through reflow soldering, which is the process of heating the solder paste to melt it and permanently attach the components to the PCB.
The Reflow Process: A reflow oven consists of a conveyor belt that moves the PCB through different temperature zones. As the PCB passes through the oven, the solder paste heats up, melts, and solidifies, forming a strong electrical connection between the components and the board.
The reflow process can be divided into four distinct stages:
- Preheat Zone: Gradually warms up the PCB and components to ensure an even heat distribution and to activate the flux in the solder paste.
- Soak Zone: This zone holds the PCB at a consistent temperature to allow the solder paste to “soak” and remove oxides.
- Reflow Zone: The hottest zone where the solder paste melts (typically around 220°C for lead-free solder).
- Cooling Zone: The PCB cools down, allowing the solder to solidify, forming solid solder joints.
Conclusion
The SMT process, though automated and efficient, is built upon careful attention to detail and precision. From the initial solder paste printing to the final reflow soldering, each step plays a vital role in ensuring the quality and performance of the final electronic product. With advancements in SMT equipment and processes, manufacturers can now achieve higher precision and efficiency, producing cutting-edge electronic devices at an unprecedented scale.
Understanding these core stages gives you insight into why SMT has become the backbone of modern electronics manufacturing, offering both high-volume capability and exceptional quality.